Clip Art graphics are popular among professionals who create presentations using MS-PowerPoint. Clip Art can also be used by anyone who wants to use graphics to convey an idea. With PayLoadz, you can sell Clip Art online in few simple steps. To start selling Clip Art, you need to sign up for a PayLoadz account, and provide your payment information such as a PayPal account or Google Checkout account details. After signing up for a PayLoadz account, please follow the steps below to sell Clip Art:
1.Login to yourPayLoadz account using your email/username and password.
2. Click on “Create a New Product” under the “Selling” tab.
3. Providebasic information such as the name of theClip Art graphic, a unique item ID and price.
4. You can also provide a custom “Thank You” text in case you want a different text to be sent other than the default text saved in your PayLoadz Profile.

5. Create an optional PayLoadz Store listing for your Clip Art graphic. It is recommended that you create a PayLoadz Store listing that provides greater visibility for the Clip Art graphic.
6. Provide information about the Clip Art graphic’s file format and the format in which it will be delivered. These two can be different. For example, aClip Art graphic can be in .TIFF format and can be delivered in the compressed .zip format.
7. Select “Photos & Images” as the main category, and choose “Clip Art” asthe subcategory.You can then select more subcategories, depending on the subcategory in which the Clip Art graphicbelongs, by clicking on “Add Category” link.
Tip:After you select the subcategory, PayLoadz shows you the average price of the products sold in that subcategory. You might want to check your prices based on that price.
8. You can also choose to make your Clip Art graphic a “Featured Product” by selecting “Yes” in the dropdown. Read more about Featured Listings.

9. Provide a product information URLif you have a Web page with more information about the Clip Art graphic.
10. Upload a small thumbnail of the Clip Art graphic by clicking on “Choose File.”
Tip:It is advisable to provide a thumbnail that is indicative of the original Clip Art graphicyou are selling because it provides an idea to buyers about the graphic they are buying.
11. Provide keywords or key phrases that describe the Clip Art graphic you are selling.
Tip:The keywords/key phrases are used for searching products. You should use the keywords based on what users would be searching for while looking for the type of Clip Art graphic you are selling.
12. Provide a description of your Clip Art graphic in the “Product Description” section. The product description should clearly describe the Clip Art graphic you are selling.
Tip: Use the toolbar in HTML editor to format the description according to your preferences. You may use different font styles, font colors, bullets and numberings.

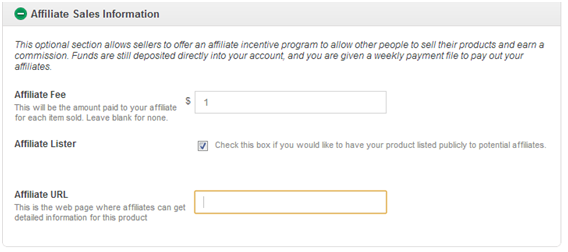
13. You can also provide the required information for using affiliates to promote your Clip Art graphic.

14. Click on the “Submit Product Information” button.
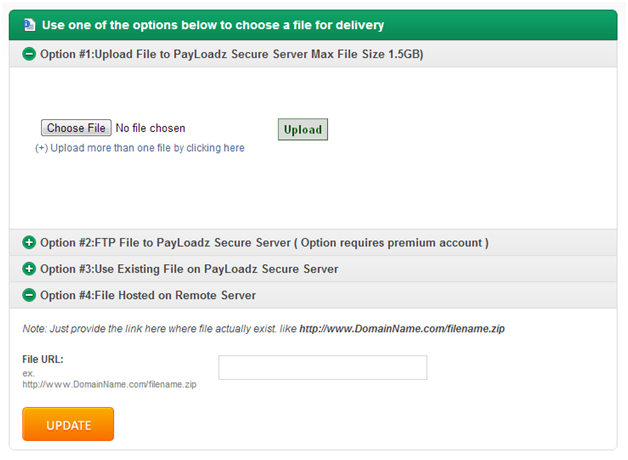
15. On the “Product File Selection” page, provide the details of the Clip Art graphic file using any of the four given options.

16. Your Clip Art graphic is now ready for sale. To get the button and/or link for the Clip Art graphic, click on View Products under “Selling” tab in the top menu.
17. Click on the “Details” link for the Clip Art graphic listing in the “Product Summary” section.
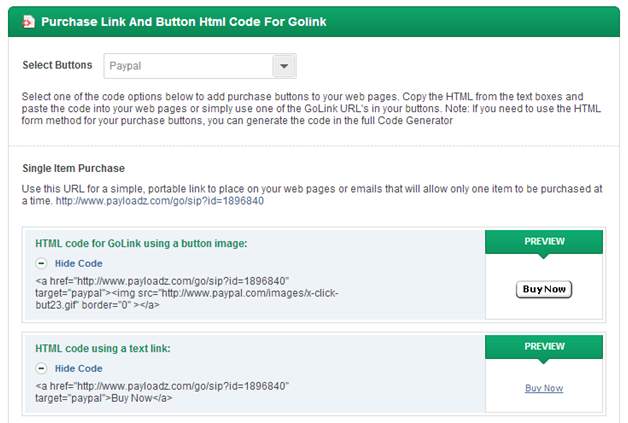
18. Click on the “Code Generator” button in the right-hand menu.
19. Choose the payment processor from the “Select Buttons” dropdown menu.
20. Copy the generated code for the button or text link,and publish it on any Webpage where you would like to sell your Clip Art graphic.

Tip: Use the simple URL provided in “Single Item Purchase” section to sell your Clip Art graphic where you cannot use the HTML code.

